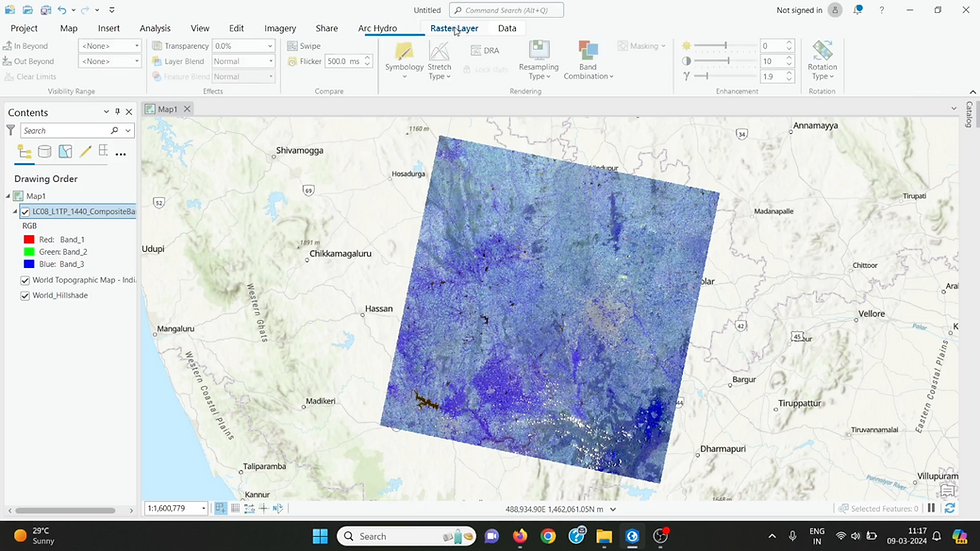
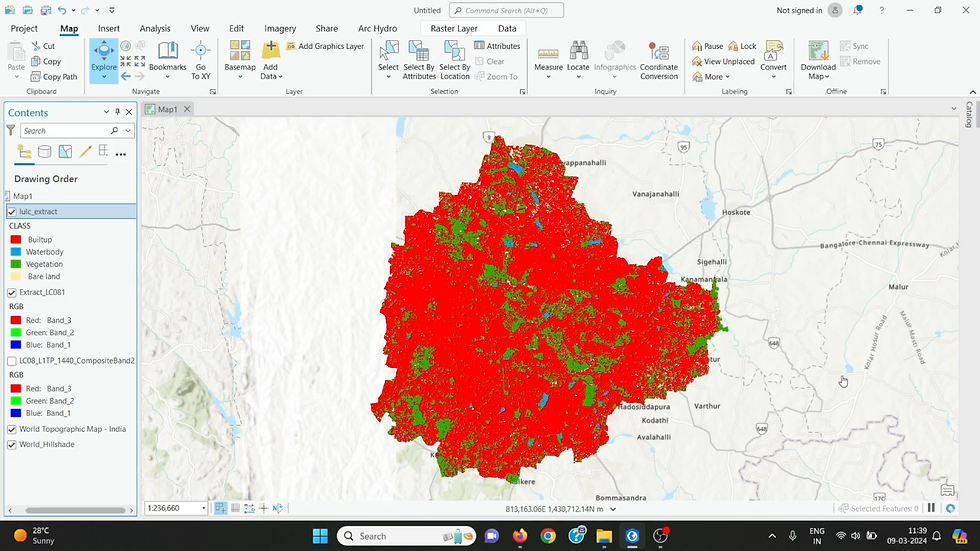
Image classification in ArcGIS Pro is a powerful tool for analyzing and interpreting satellite imagery and other remote sensing data. This process involves categorizing pixels in an image into various classes or themes, such as land cover types, vegetation, water bodies, and urban areas. By using advanced algorithms and machine learning techniques, ArcGIS Pro can accurately classify and map these features, enabling users to gain valuable insights into geographic patterns and changes over time.

Usages of Image Classification in ArcGIS Pro:
Environmental Monitoring: Track changes in land use, forest cover, and water resources to support conservation efforts and sustainable development.
Urban Planning: Analyze urban growth, infrastructure development, and land use patterns to inform city planning and management.
Agriculture: Monitor crop health, classify different crop types, and assess agricultural productivity for better resource management.
Disaster Management: Identify affected areas, assess damage, and support recovery efforts in the aftermath of natural disasters.
Resource Management: Map and manage natural resources like minerals, oil, and gas by identifying relevant surface features and patterns.
Let's dive into the practical example of image classification in ArcGIS Pro:
Opening ArcGIS Pro and Loading the Project:
Open ArcGIS Pro.
Load the project file that includes the raster data to be classified.

Adding Raster Data:
Go to the "Map" tab.
Click "Add Data" and select the raster dataset (satellite or aerial imagery) for classification.

Accessing the Image Classification Tools:
Navigate to the "Imagery" tab.
Select "Classification Tools" from the options.

Choosing a Classification Method:
Open the "Classification Wizard" from the Imagery tab.
Choose the classification method (e.g., Supervised or Unsupervised Classification).

Training Sample Manager (for Supervised Classification):
If using Supervised Classification, open the "Training Sample Manager."
Create training samples by drawing polygons on the raster data to represent different land cover classes (e.g., water, vegetation, urban).

Running the Classification:
Use the training samples to run the classification algorithm.
Adjust parameters as needed and run the classification process.

Reviewing and Refining Results:
Review the classified output.
Refine the classification by adjusting parameters or adding more training samples if necessary.

Exporting the Classified Map:
Once satisfied with the classification results, export the classified map.
Save the classified output as a new raster layer in the project.

Conclusion
Image classification in ArcGIS Pro is a powerful tool that allows users to analyze and interpret raster data, such as satellite or aerial imagery, for various applications. By following a structured workflow, users can efficiently categorize different land cover types and extract meaningful information from their imagery datasets.
In this blog, we walked through the essential steps involved in the image classification process using ArcGIS Pro. Starting from loading the project and adding raster data, to selecting a suitable classification method and creating training samples, each step plays a crucial role in achieving accurate and reliable classification results. The intuitive interface and comprehensive tools available in ArcGIS Pro make it accessible for both novice and experienced users to perform image classification effectively.
As demonstrated, the classification results can be reviewed, refined, and exported for further analysis or reporting. This process not only enhances the understanding of geographic areas but also supports decision-making in various fields such as urban planning, environmental monitoring, and resource management.
By leveraging the capabilities of ArcGIS Pro for image classification, users can unlock the full potential of their spatial data, leading to more informed and impactful insights. Whether for academic research, professional projects, or personal exploration, mastering image classification in ArcGIS Pro opens up a world of possibilities for spatial analysis and geographic understanding.
.png)
Comentários