BIM & GIS Integration: A Step-by-Step Guide to Importing and Georeferencing BIM Data in ArcGIS Pro
- Prasanna P N
- Dec 30, 2024
- 3 min read
Introduction
The integration of Building Information Modelling (BIM) with Geographic Information Systems (GIS) opens endless possibilities for architects, engineers, urban planners, and GIS professionals. Whether it is urban planning, facility management, or 3D visualization, georeferencing BIM data in ArcGIS Pro ensures accurate spatial alignment and analysis. In this guide, we will walk you through the step-by-step process of importing BIM data into ArcGIS Pro and georeferencing your 3D models for seamless integration.
Why Integrate BIM with GIS?
BIM provides detailed 3D models of buildings and infrastructure, while GIS offers spatial context and analytical tools. Combining these two technologies allows professionals to:
Visualize BIM models within real-world environments.
Analyse spatial data for urban development and disaster planning.
Share geospatial insights with stakeholders.
Let us dive into how you can achieve this integration using ArcGIS Pro.
Step 1: Prepare Your BIM Data
Before diving into ArcGIS Pro, ensure your BIM data is ready for import:
File Format: Use ArcGIS-compatible BIM formats such as Autodesk Revit (.RVT) or Industry Foundation Classes (.IFC).
Coordinate Reference System (CRS): Verify if your BIM model has spatial reference information. If not, you will define it later in ArcGIS Pro.

Step 2: Set Up Your ArcGIS Pro Project
Launch ArcGIS Pro and create a new or open an existing project.
Choose a Local Scene for small-scale areas or a Global Scene for larger regions.
Make sure your 3D environment is configured to support BIM data.

Step 3: Add BIM Data to ArcGIS Pro
Open the Catalog Pane and navigate to the folder containing your BIM file.
Add the folder as a connection and expand it to view the BIM dataset.
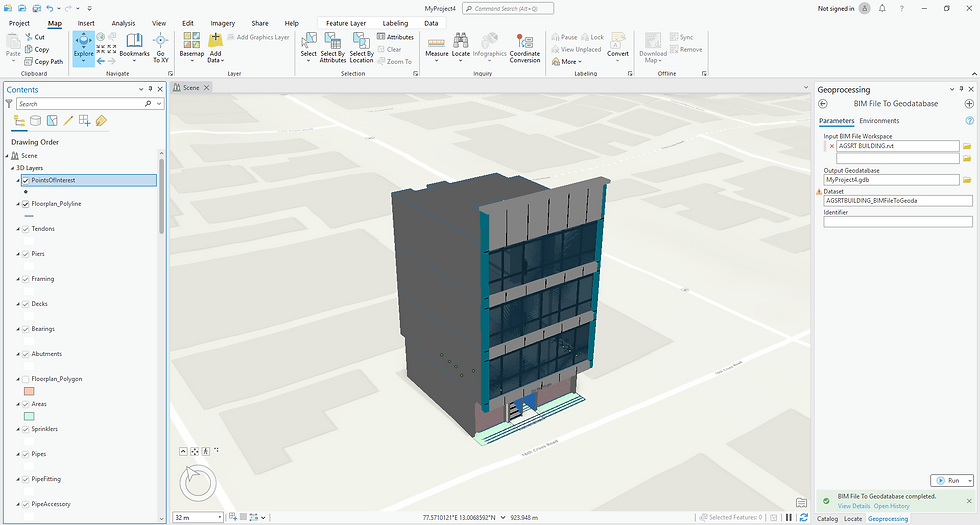
Drag and drop the BIM dataset or individual layers into your map or scene. These layers include components like walls, floors, and windows.

Step 4: Define the Coordinate System
Right-click on the BIM dataset in the Contents Pane and select Properties to check its CRS.
If the CRS is missing or incorrect, use the Define Projection tool to assign the correct CRS.
Select a CRS that aligns with your project’s spatial data.

Step 5: Georeference the BIM Model
Activating Georeferencing Tools:
Go to the Edit Tab and select tools like Move or Rotate for initial alignment.
Access the Georeferencing tab to refine placement.
Using Control Points:
Add control points by selecting features in the BIM model and matching them with known geographic features in your base map.
Compare the model against high-resolution imagery or surveyed data for accuracy.

Step 6: Convert BIM Layers to GIS Features
To fully leverage BIM data in GIS workflows, convert BIM layers to GIS-compatible formats:
Use tools from the Conversion toolbox to convert BIM data into multipatch feature classes.
Save the converted data in a geodatabase for efficient storage and retrieval.


Step 7: Verify Alignment in the 3D Scene
Inspect the georeferenced model in your 3D scene:
Pan, zoom, and rotate to check the spatial alignment.
If misaligned, adjust using the Georeferncer.

Step 8: Save and Share Your Work
Save your ArcGIS Pro project to retain the georeferencing updates.
Share your georeferenced BIM data as a Web Scene for stakeholders to explore in interactive 3D environments.
Conclusion
Integrating BIM data into ArcGIS Pro and georeferencing your 3D models enhances your ability to analyse, visualize, and share spatial insights. From urban development to facility management, this process provides a unified approach to spatial planning. Start exploring the power of BIM and GIS integration today, and take your projects to the next level!
.png)
Comments